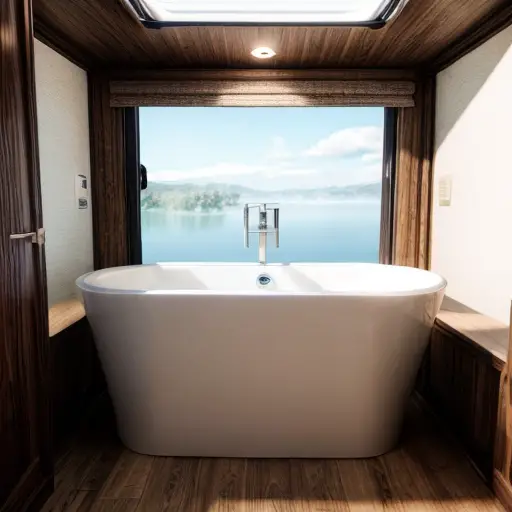
Fixing a Leaky Camper Roof: A Step-by-Step Guide
Identifying the Source of the Leak: Understanding Common Roof Leak Culprits
Ah, the joys of owning a camper! Exploring the great outdoors, smelling like a campfire 24/7, and of course, dealing with the occasional leaky roof. It’s like nature’s way of reminding you that no matter how waterproof your gear claims to be, water always finds a way. So, let’s dive into the thrilling world of identifying the source of the leak on your beloved camper roof, shall we? Cue the Sherlock Holmes music! From pesky cracked seals that are about as reliable as an umbrella in a hurricane, to shifty plumbing fixtures that secretly enjoy moonlight water ballet, we’ll uncover these sneaky culprits and find out just how to fix them. So grab your magnifying glass and let’s catch those leaky bandits!
Assessing the Damage: A Step-by-Step Guide to Inspecting Your Camper’s Roof
An interesting fact about how to fix a leaky camper roof is that you can use a surprising household item to seal the leaks temporarily: a bag of potato chips! The oil and salt present in the bag can be rubbed onto the affected areas of the roof, creating a temporary waterproof seal. This hack works best for small cracks or leaks that require a quick fix until proper repairs can be made. However, it is important to note that this is just a temporary solution and professional repairs should be conducted for a long-term fix.
Alright, fellow adventurers and fellow survivors of leaky camper roofs, buckle up because we’re about to embark on a wild journey of assessing the damage! Picture this: you’re ready to hit the road, feeling like a modern-day explorer, when suddenly you notice a pesky leak ruining your camping dreams. Fear not, campers, for I have got you covered (pun very much intended) with a step-by-step guide to inspecting your beloved portable home’s roof. From climbing up ladders with grace (or not) to deciphering strange noises in the night, we’ll tackle it all. So grab your tool belt, a wicked sense of humor, and let’s save those camping trips, one patch at a time!
Choosing the Right Repair Method: Exploring DIY vs. Professional Solutions
So, you’ve got a leaky camper roof, huh? Well, my first piece of advice would be to invest in a good umbrella, because you’re undoubtedly going to need it when you wander into the vast wilderness of repair options. And trust me, the options are about as vast as the number of raindrops falling through your precious camper ceiling. It’s decision time, my fellow camping enthusiasts, because today we dive headfirst into the thrilling world of choosing the right repair method: DIY vs. professional solutions.
Now, if you’re an adventurous soul with a can-do attitude and a knack for fixing things with duct tape, congratulations! You’ve just joined the prestigious ranks of the DIY repair squad. Picture this: you, armed with a toolbox filled with hammers, nails, and a patchwork quilt of enthusiasm, climbing up that shaky ladder like a modern-day rooftop superhero. You’ll proceed to stare down that leaky camper roof like a seasoned gladiator, ready to battle the elements, armed only with your wits and a YouTube tutorial.
But hold on a second, fearless handyman! Let’s not forget that your choice between DIY and professional solutions could be the difference between a quick fix and a never-ending leaky roof nightmare. Sure, embracing your inner Bob the Builder might save you a few bucks and give you a captivating story to tell around the campfire, but have you considered the potential pitfalls? Fixing a camper roof requires more than just creativity; it demands expertise and a deep understanding of the glorious world that exists above your head. Are you ready to ascend to such heights, or would you rather hand over the reins to a seasoned professional?
Enter stage right, the knights in shining armor of the repair world – the professionals. These roof-repair wizards possess magical powers that transform your leaky camper roof into a fortress of dryness. Okay, that may be a slight exaggeration, but these experts are trained in the ways of roofs. They’ve seen it all, from simple drips to deluges of epic proportions. Hiring a professional means tapping into a wealth of knowledge that might just save your sanity (and your roof!). Plus, you won’t have to risk life and limb on that ladder, which let’s face it, feels about as stable as a Jenga tower after a few too many rounds of tequila.
But wait, hold your horses, Mr. and Mrs. Camper. Before you whip out your credit card, remember that professionals come at a cost. You’ll have to fork over some hard-earned cash to bring in the cavalry, and that post-repair bill might just give you heart palpitations worse than facing a grizzly bear with a toothache. However, there’s something blissfully reassuring about knowing that your leaky camper roof is in the hands of someone who won’t mistreat it like a forgotten lawn gnome.
So, my fellow road trippers, as you sit in your soggy camper pondering the great DIY vs. professional repair debate, remember that the battle lies between passion and expertise, adventure and comfort, creativity and reliability. There’s no one-size-fits-all answer, but with a bit of research and a sprinkle of humor, you might just find the perfect solution to your leaky roof conundrum. Safe travels, campers, and may your roofs stay dry and leak-free for many miles to come.
Executing the Repair: Step-by-Step Instructions for Fixing Leaky Camper Roofs
Fun fact: Did you know that in order to fix a leaky camper roof, there is a special sealant called ‘Liquid Roof’ commonly used? This sealant, similar to a thick liquid coating, can be easily applied to the roof’s surface, forming a watertight barrier. It’s not only great for fixing leaks but also provides protection against UV rays and harsh weather conditions, thereby extending the life of your camper roof. So, if you spot a leak, remember that Liquid Roof can come to the rescue and save your camping adventures!
Are you ready to embark on a hilarious adventure to fix that stubborn leaky camper roof? Well, get your tools and a good dose of humor because we’re about to dive into the world of amateur roof repairs. Step one: Find the leak, and if you’re anything like me, you’ll probably end up pouring a bucket of water on yourself instead. Step two: Curse vigorously at the invisible rain cloud that seems to be haunting your precious camper. Step three: Don’t panic! Just slap some duct tape on the leak and hope for the best. Step four: Realize that duct tape is not the magical solution you were hoping for and contemplate a career as a roof repair specialist. Step five: Finally, after countless YouTube tutorials and a spiritual journey to find inner peace, attempt a proper roof repair. And remember, if all else fails, just throw a tarp on top and start a trend as the trendsetter of fashionable leaky camper roofs!

Jake is a man of many talents, but his true passion lies in the world of camping and campers. With a mischievous sense of humor and a knack for storytelling, he takes his readers on hilarious adventures through his blog. Whether he's recounting his own camping mishaps or poking fun at the quirks of fellow campers, Jake's witty anecdotes and clever observations never fail to entertain. With his infectious enthusiasm for the great outdoors and his ability to find humor in even the most challenging camping situations, Jake's blog is a must-read for anyone looking to laugh their way through the wilderness.