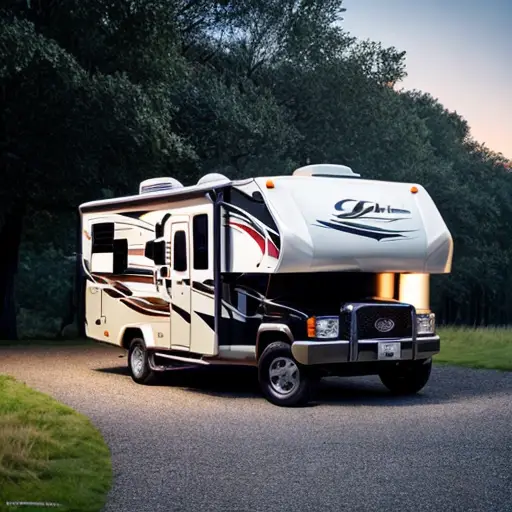
Repairing the Front of a Camper – A Step-by-Step Guide
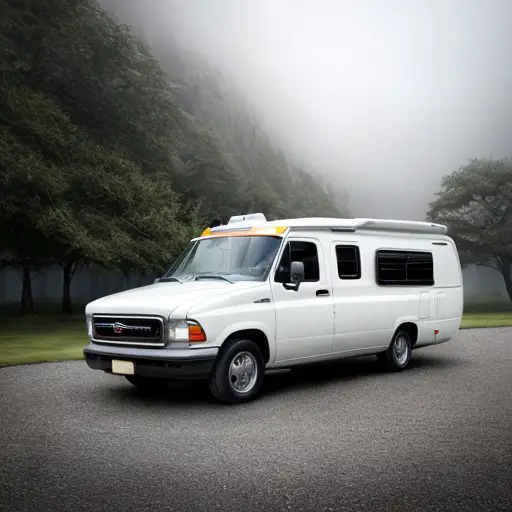
Assessing Damages and Preparing the Front of Your Camper for Repair
So, you’ve taken your camper out on a wild adventure, careening through the great outdoors like a daredevil on vacation. But alas, your reckless escapades have left the front of your beloved camper looking like it got into a battlefield with a flock of angry seagulls. Fear not, fellow adventurers! It’s time to assess the damages and get that camper looking as good as new. Step one: Take a deep breath, put on your brave face, and try to hold back those tears of camper remorse. Step two: Take stock of the damage. Is it just a few dents and scrapes or does it resemble a modern art masterpiece gone wrong? Assessing the extent of the chaos will help you plan your battle strategy. And finally, step three: Prepare to tackle those damages head-on. Grab your toolbox, your magic wand, or just some good old-fashioned elbow grease, and get ready to work some serious repair magic on that front end. Because when life throws rocks at your camper, you show them who’s boss!
Step-by-Step Guide to Repairing Fiberglass and Metal Panels on the Front of Your Camper
An interesting fact about repairing the front of a camper is that some campers actually have removable front panels, which can make repairs and replacements much simpler and more cost-effective. This innovative design feature allows owners to easily remove the damaged panel and replace it with a new one, eliminating the need for extensive and time-consuming repairs.
So, you’ve gone on one too many camping trips where you accidentally became ‘one with nature’ by plowing your camper’s front end into a tree. Hey, it happens to the best of us! But fear not, my fellow wilderness adventurer, because I’ve got the ultimate step-by-step guide to patching up those fiberglass and metal panels on the front of your trusty camper. Now, first things first, take a deep breath and try not to curse that innocent tree (it was totally asking for it though, just saying). Grab your tools and a can-do attitude, because it’s time to turn your camper’s face from a mangled mess to a shining beauty that would make even that meticulous squirrel jealous. Buckle up, my friend, we’re about to embark on a repair journey that’s bound to leave your camper looking like it’s never seen a tree in its entire adventurous life. Let’s do this!
Painting and Rejuvenating the Front of Your Camper: Tips and Techniques

Are you tired of cruising down the open road in a camper that looks like it’s been through one too many battles? Fear no more, fellow adventurers, for I am here to shed light on the mystical world of camper face-lifts! Today, we delve into the realm of painting and rejuvenating the front of your trusty mobile abode, bringing back its long-lost glory and turning heads at every campsite. Picture this: you’re parked at a stunning campground, surrounded by the beauty of mother nature, and everyone is in awe of your snazzy camper. ‘How did they manage to make it look so fabulous?’ they’ll wonder. Well, my friends, it all starts with a little elbow grease and a lot of laughter.
First things first, grab your tool belt and muster up your painting prowess. We’re about to embark on a transformative journey that will leave your camper looking like it just rolled off the production line. Before dipping your brush into a kaleidoscope of colors, though, you need to give your old buddy a thorough cleaning. Trust me; this step will make all the difference. Armed with a bucket of soapy water and a spray nozzle with the power of a jet engine, attack the front of your camper like you’re a superhero battling dirt and grime. Scrub away until even the tiniest speck of yesterday’s adventures is a distant memory.
Now that your camper is squeaky clean and gleaming like a brand-new penny, it’s time to assess any damaged areas that need some tender loving care. Inspect your front surface for any cracks, chips, or loose panels – almost like giving it a spa treatment. You wouldn’t want any hidden surprises popping up mid-rejuvenation, would you? With a keen eye and a touch of Sherlock Holmes’s intuition, address these issues head-on. Patch up those cracks like a pro with a high-quality adhesive and replace any loose panels to ensure a solid foundation for your artistic endeavors.
Ah, now comes the joy of selecting the perfect color scheme for your mini marvel on wheels. Remember, this is your chance to let your personality shine through, so don’t be afraid to think outside the box. Maybe neon pink with zebra stripes? Or perhaps a classic vintage vibe with a touch of hippie chic? The options are endless, my fellow campers. Once you’ve chosen the colors that will make your heart sing every time you set foot in your newfound oasis, it’s time to bring out your painting arsenal. Rollers, paintbrushes, tape, and, of course, the most critical ingredient of all – laughs! Trust me, painting while laughing is like adding an extra layer of magic to your masterpiece.
Begin by masking off areas you don’t want to paint, like your windows or those beloved collection of quirky stickers. Artistic freedom is wonderful, but let’s not go overboard and paint those beloved memories away! Now, armed with a brush dripping with determination and a bucket full of your chosen hue, start painting that front section with the grace of a ballerina and the precision of Picasso. Take your time and allow the paint to bring your camper to life. Remember, mistakes are nothing but happy accidents. Don’t be disheartened if you accidentally splatter paint on your face or step back into the pail. Embrace the chaos and realize that the mess is just part of the journey.
Once the final brushstroke is complete, stand back and admire your masterpiece. Breathe in that fresh coat of paint, revel in the triumph of turning your tired camper into a dazzling beauty, and get ready for the endless compliments that will surely follow. You, my friend, have just breathed new life into your beloved home on wheels, transforming it into a head-turning work of art. So, embark on your next adventure with pride, for you are now the proud owner of a camper that will make even the most snobby of s’more connoisseurs green with envy. Safe travels and may the open road guide you to endless laughter and memories with your one-of-a-kind cruising companion!
Restoring Functionality and Aesthetics: Replacing Front Accessories and Trim on Your Camper
Fun fact: Did you know that repairing the front of a camper can sometimes involve unconventional materials? In a pinch, some creative campers have used duct tape to temporarily patch up damages until they could get to a professional repair shop. So, the next time you find yourself with a few unexpected cracks or bumps on your camper’s front, reach for the trusty duct tape and channel your inner MacGyver! However, keep in mind that duct tape is just a temporary solution and it’s always best to consult experts for a more permanent fix.
Are you tired of your camper’s front looking like it got into a fight with a roadside shrub? Fear not, fellow campers! It’s time to restore both functionality and aesthetics to your beloved mobile vacation oasis. Let’s face it, that front grill may have seen better days. And those once-shiny headlights now resemble raccoon eyes after a night of camping misadventures. But don’t worry, we’ve got the perfect solution for you. By replacing those worn-out front accessories and trim, you’ll not only regain your camper’s swagger but also ensure optimal functionality. So bid adieu to the unsightly battle scars and get ready to turn heads on the open road while keeping those pesky bugs out of your teeth! Camping has never looked this good, my friends!

Jake is a man of many talents, but his true passion lies in the world of camping and campers. With a mischievous sense of humor and a knack for storytelling, he takes his readers on hilarious adventures through his blog. Whether he's recounting his own camping mishaps or poking fun at the quirks of fellow campers, Jake's witty anecdotes and clever observations never fail to entertain. With his infectious enthusiasm for the great outdoors and his ability to find humor in even the most challenging camping situations, Jake's blog is a must-read for anyone looking to laugh their way through the wilderness.