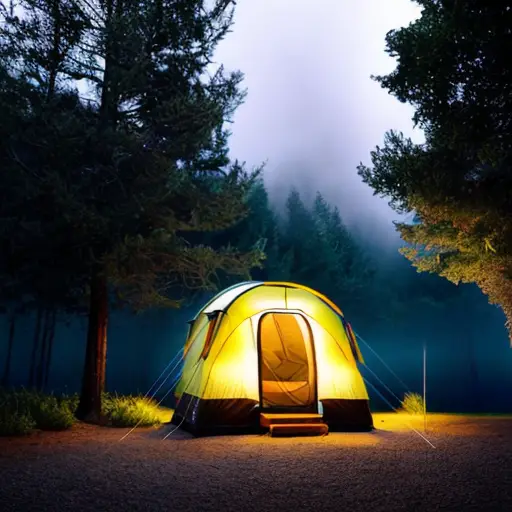
Easy Steps to Reseal Your Camper Roof
Assessing the Roof Condition: A Comprehensive Guide to Determine if Your Camper Roof Needs Resealing
Hey there fearless campers! So, you’ve decided to take your beloved camper on another adventure, but before you hit the road, it’s time to channel your inner inspector gadget and assess that roof condition! Don’t worry, this comprehensive guide will make it as easy as s’mores on a summer night. Okay, first things first, grab a sturdy ladder, and prepare to ascend to roof kingdom. Check for any cracks, tears, or suspiciously puffy spots (we’re not talking soufflés here). Once you’ve assessed the damage, it’s time to bust out the big guns – resealing! Think of it as giving your camper’s roof a spa day, but instead of cucumbers on the eyes, it’s a layer of protective sealant. So, gear up, raise your DIY flag, and get ready to show that camper roof who’s boss! Trust me, your beloved home on wheels will thank you with smooth rides and leak-free adventures. Happy sealing, fellow road warriors!
Gathering the Essential Tools and Materials: The Complete Checklist for a Successful Camper Roof Resealing Project
An interesting fact about how to reseal a camper roof is that the use of specially formulated sealants can actually help improve the energy efficiency of the camper. By creating an airtight seal on the roof, these sealants can prevent air leaks and reduce the camper’s overall energy consumption by maintaining a consistent temperature inside the vehicle, ultimately leading to cost savings on heating and cooling.
Gathering the Essential Tools and Materials: The Complete Checklist for a Successful Camper Roof Resealing Project
Ah, the joys of camper roof resealing! Is there anything more exhilarating than ascending to the top of your beloved RV to tackle a project guaranteed to test your sanity? If you’ve decided to take on this noble endeavor, fear not, for I have concocted the ultimate checklist to ensure your survival. First on the roster is an impressive assortment of sealants – the more options, the better. Don’t forget your trusty putty knife, ready to gracefully spread the gooey goodness without causing too much havoc. But wait! You won’t be victorious without a selection of brushes, rollers, or even sponge applicators, sparking envy in the hearts of all mere mortals. Lastly, don’t overlook the most important tool in your arsenal: a sense of humor, as you embark on this adventure, remembering that every epic camper roof resealing story should include copious amounts of laughter (and probably a few tears) along the way. Best of luck, fellow adventurers!
Step-by-Step Repair Process: A Practical Approach to Resealing Your Camper Roof and Preventing Water Damage
So you’ve decided to take on the daunting task of resealing your camper roof, huh? Well, kudos to you for embarking on this adventure that’s sure to make your inner DIY enthusiast squeal with glee! Now, keep in mind, my friend, that resealing a camper roof is no walk in the park. It requires a practical approach, a steady hand, and maybe a couple of strong cups of coffee to keep you sane throughout the process.
First things first, gather your materials. You’ll need a caulking gun – your trusty sidekick in this mission – and of course, some high-quality sealant that will do the job right. Now, it’s important to choose the right sealant for your camper roof. Think of it as a matchmaking process between your roof and the sealant – they need to be compatible, like a match made in DIY heaven. Don’t worry, though; it’s not as complicated as finding your one true love!
Once you’ve got your materials in hand, it’s time to assess the situation up there on your camper roof. Our dear friend gravity tends to make things slide down, and this includes sealant. So, you might find yourself in a sticky situation (pun intended) if you don’t clean the roof thoroughly before applying the new sealant. Get ready to face some tough love and scrub any dirt, debris, or remnants of old sealant left behind. It’s like giving your roof a much-needed spa day!
Now, before you start applying the sealant like Picasso on canvas, let’s talk about a crucial step in this resealing process – the primer. Just like makeup primer preps your skin for a flawless finish, using a primer on your camper roof helps the sealant adhere better and creates a strong bond. It’s like giving your roof a little talk and pep talk, convincing it to cozy up with the sealant like long-lost besties.
Okay, now that we’re primed and ready, grab that caulking gun and squeeze that sealant like there’s no tomorrow. Start from one edge of the camper roof and work your way toward the other, as if you’re creating a watertight masterpiece. Smooth out the sealant with a caulk smoothing tool or your finger – you’re an artist after all! But beware of excess sealant; you don’t want your roof looking like it’s been slathered in icing. Trust me, it won’t win any beauty awards.
Voila! You’ve successfully resealed your camper roof like a pro! But hold your horses, my ambitious friend, we’re not done yet. Prevention is key, and it’s time to take preventive measures to avoid water damage in the future. Remember, your camper deserves the royal treatment! Inspect your roof regularly, keep an eye out for any cracks, or signs of wear and tear. Don’t let those sneaky water droplets scheming their way through your living space!
Resealing your camper roof may seem like a daunting task, but armed with a practical approach (and maybe a pun or two), you can conquer it like a champ. So, go forth, my fearless DIY warrior, and let the world know that you won’t let a leaky camper roof rain on your parade!
Proactive Maintenance Tips: Expert Suggestions to Extend the Lifespan of Your Camper’s Roof Sealant
Fun Fact: Did you know that one creative way to reseal a camper roof is by using an unconventional ingredient – trusty household pantyhose! By cutting the legs of old pantyhose into strips, you can create a makeshift roof seal that keeps the elements at bay. Simply dip the strips into a bucket of sealant and place them along the seams or cracks, creating a tight bond when dried. It may sound strange, but this budget-friendly hack has proved to be surprisingly effective for many outdoor enthusiasts!
Are you tired of feeling like you need a PhD in roof sealants every time you go near your beloved camper? Well, fear not, fellow adventurers, because I’m here to share some proactive maintenance tips that will not only extend the lifespan of your camper’s roof sealant but also keep you from losing your sanity in the process. Now, picture this: you, the courageous explorer, armed with a tube of sealant and a can-do attitude, ready to conquer any leaks or cracks that dare to challenge your roof’s integrity. Embrace the power of resealing, my adventurous friends, and bid adieu to water damage and unexpected showers in your home on wheels. Don’t just prolong the lifespan of your camper’s roof sealant; become its ultimate protector, the Sealant Guru of the open road!

Jake is a man of many talents, but his true passion lies in the world of camping and campers. With a mischievous sense of humor and a knack for storytelling, he takes his readers on hilarious adventures through his blog. Whether he's recounting his own camping mishaps or poking fun at the quirks of fellow campers, Jake's witty anecdotes and clever observations never fail to entertain. With his infectious enthusiasm for the great outdoors and his ability to find humor in even the most challenging camping situations, Jake's blog is a must-read for anyone looking to laugh their way through the wilderness.